Below is the initial framing of the cabinet for the dogbot. I used rough redwood which you can find at Home Depot in the fencing section. Cedar is a little cheaper, but I like redwood because it's more durable and long-lasting. The key to the low price is that the wood is "rough" and not milled. The flat pieces are all dogeared fence planks, which are framed together with 2x2 rough redwood. These 2x2 pieces tend to be a bit curvy, so make sure you get some straight ones if you use them in your project.

I used a jigsaw to cut out holes large enough to hold the lip of the large dog bowls I planned to use.

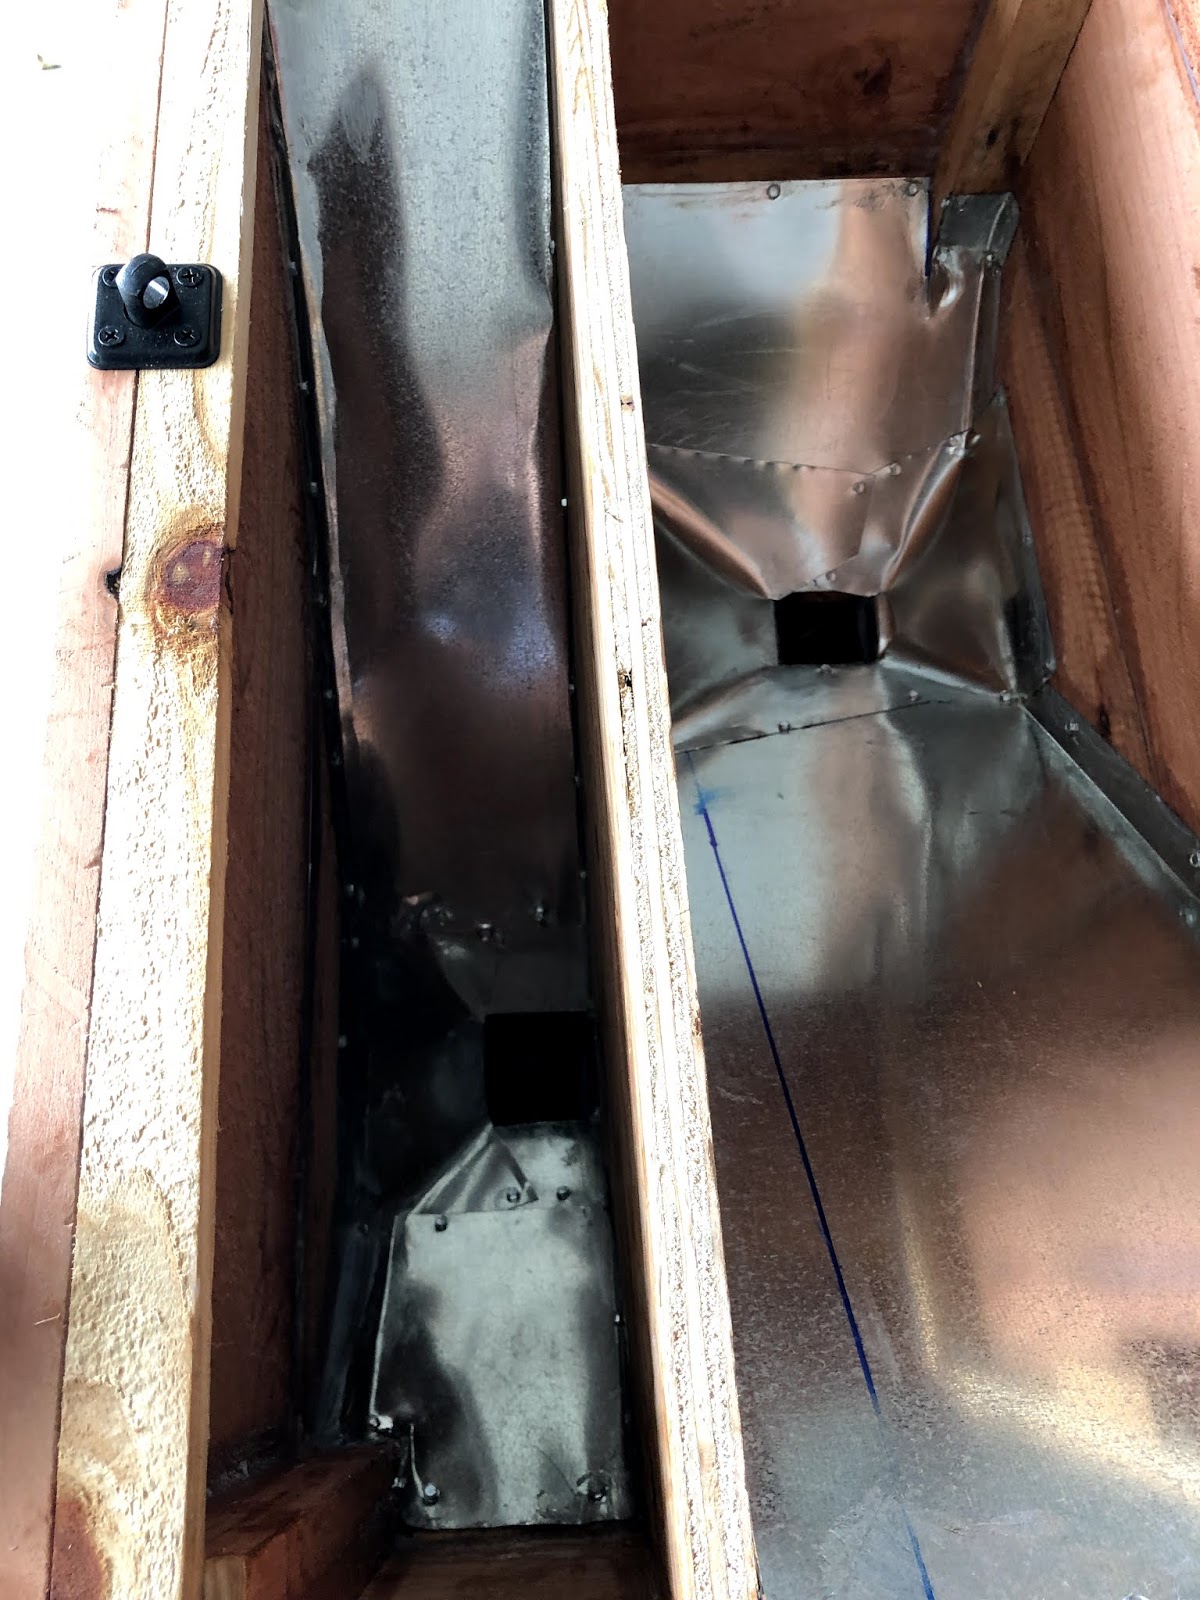
I had to put some thought into the hoppers for the augers. I roughed the shape together with scrap pieces of wood and finished them off with some galvanized sheet metal found in the ducting section of Home Depot.


I used silicone to seal off any cracks between pieces of wood or between the sheet metal in wood to keep pests out of the food. I made sure the seals were as airtight as possible, even with the hinged top where I ran a thin layer of silicone around the edges of the wood.
I missed taking a photo of the LED strip I ran on the front of the cabinet before I covered it with some wood pieces. Below is finished work with the LEDs able to shine out of a gap between the pieces of wood. This produces the effect I was looking for with the LED traveling back and forth to show the dogbot was on and then lit up with an when something happens. You can see this in the video on the Introduction page of this blog.

The back shows how I have a piece of wood where the power cord comes out that can be easily removed by removing the screws if I ever need to go work on an electrical component.

I used to worry about being late for my dog’s mealtime, but now I just set the timer, and it does the job. It’s especially helpful for portion control if you have a pup on a diet. If you’re looking for convenience and peace of mind, an automatic feeder is a must-have. Best automatic dog feeders
ReplyDelete